Showing posts with label How To. Show all posts

Friday, July 8, 2011

The blush brush trick

I remembered when I started using make up, I don't have anyone I could ask or get opinion on what or what not to do. The most instant reaction was to apply make up with the sense of what I saw from girly shows / magazines that I happened to flip. 
I hope with the upcoming posts, I could show you the small little tricks here and there I came across these years. It might not be a big impact to most of you, but these have become my habit. 

So the first thing I would like to share is blusher! I remembered when I got my first few blush on, the way i applied it was to dap my brush to the blusher in circular motion for 2 to 3 times before applying them to my cheeks. Then I would go back to do this a couple of times as I find that the colours are not visible enough. 

Not sure whether many will realise this, but I find that doing this is actually taking more time and the blusher is used up faster. The way i like to do it now is to squeeze the brush tips first before dapping it to the blush on, swipe it twice and you get the just about right tone on your cheeks. ^ ^


Squeeze the brush with your fingers before padding them to your blusher

This way you can get more colour on your brush 
I hope this have been a fun post as much as I enjoyed sharing them. 

Tuesday, July 5, 2011

How I keep my hairbands, belts and scarfs

I just want to share another How to idea of mine. I love hairbands, headbands, you name it. But it could be quite a headache where to store them sometimes. 
When i saw this lamp in Ikea, i immediately thought this is perfect! It have 2 lamps (1 floor uplighter, and the other is a reading lamp which is bendable). 
What i did was to make use of the space between the bendable reading lamp and the floor uplighter. Now, all my headbands, scarfs, belts are placed nicely and the best part is I could reach out easily and pick out what hairbands, belts and etc to match my outfit of the day in 1 glance.

IKEA - floor uplighter /reading lamp @29


My headbands, scarfs, belts area
I hope you enjoyed another How i do it idea!

Thursday, March 17, 2011

How To : Tie a Tie

This post is specially dedicated to my dearest friend, Merlyn that is getting married this Sunday. 
I hope the step by step guide will be of some help on the big day!!

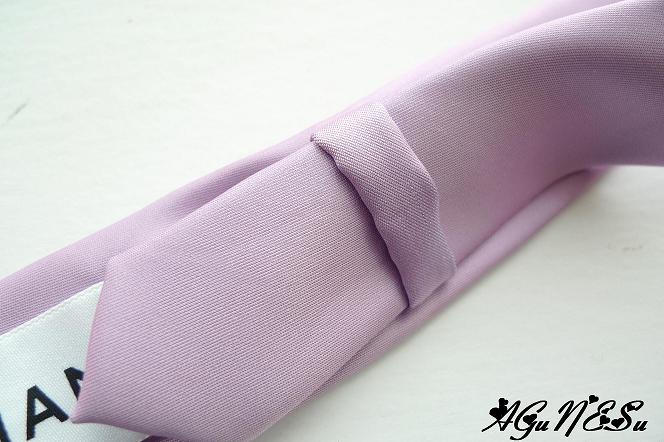
The lines on the tie is a good indicator to know where to place
 the tie. It should rest nicely between your neck and chest bone

1. The shorter / thinner side of the tie
2. The longer / thicker side of the tie


Pull 1 and 3 at the same time to tighten the tie

Bring down the collar, adjust accordingly and
voila, you are done.

There is a normally a hole at the back of the tie

Remember to place the thinner side of the tie inside it, so it wont be flapping out 

This is one of the easiest and fastest way to tie a tie, hope this helps!!

Wednesday, March 2, 2011

Nail Of The Week - Garden Theme

I figured I would do another nail tutorial which is quite easy and fun.

Garden Themed nails

OPI Nail polish - Passion NL H19

Apply 2 coats over it to get a very nice base colour

CANMAKE - Nail glitter 02 (Gold)

Apply it on the top of your nails - Using soft stroke the 1st time round,
focusing more on the tip on the 2nd coat

You can get this "wax" looking tube on any nail shop $1.90ea 

Use a nail glue / clear nail polish to place where you want the design to be. 
Apply top coat over it to finish the whole look.

I hope you guys enjoyed this! 

Tuesday, January 4, 2011

How I organise my make up brushes and hair acessories

Make up brushes and hair accessories are just one of those things that girls cant do without. I used to have problems organising my make up brush and finding my hair pins. When I went IKEA recently, I saw some clear vases and containers that is suitable to place all my brushes, eye-liners, mascaras, bobby pins and etc

REKTANGEL vase from IKEA at $5.90ea

Some colourful pebbles from Carrefour at $4.90 per packet (I got in in 2 colours)

Mix all the pebbles and put in in the vase. Now you can start putting in all your brushes

I did the same for all my mascaras, eyeliners and etc

Voila! I love how pretty it looks when you place them together

SLOM Jar with lid from IKEA at $2.20
I use this to place all my bobby pins, elastics and hair clips

One single stop for all those small hair accessories and its dust free!

Hope you guys enjoyed this as much as I enjoyed sharing another favourite thing of mine